This documentation is not maintained and could be outdated
The good news is: a better solution, based on a Shortcode, is available and documented.
Wait, there is a module for this
Before implementing this solution, check out
the module “Hugo notice”, it may suit your needs.
The method below is easier to insert and extend.
Objective
Hugo uses Markdown and offers many different ways to format your text. It’s also possible to add custom styles, like the following infoboxes:
Overview
We first need to add some custom CSS to our theme and add a tiny custom font (7kb).
Then we’ll tweak Vscode to make it easy and fast to insert our different boxes.
Set some custom CSS
The theme BeautifulHugo makes it damn easy (and if you use another theme, check out this guide from Matt Mayes).
-
Create a file named
layouts/partials/head_custom.html -
Insert the following lines:
<!-- Custom css insertion -->
<link href="{{ .Site.BaseURL }}css/boxes.css" rel="stylesheet">
- Create a file
static/css/boxes.cssand paste these lines:
@font-face {
  font-family: "icons-boxes";
  src: url("../fonts/icons-boxes.eot?bzmaom");
  src: url("../fonts/icons-boxes.eot?bzmaom#iefix") format("embedded-opentype"),
    url("../fonts/icons-boxes.ttf?bzmaom") format("truetype"),
    url("../fonts/icons-boxes.woff?bzmaom") format("woff"),
    url("../fonts/icons-boxes.svg?bzmaom#icomoon-notices") format("svg");
  font-weight: normal;
  font-style: normal;
  font-display: block;
  font-variant: normal;
  text-transform: none;
  line-height: 1;
}

[class^="box"],
[class*=" box"] {
  /* use !important to prevent issues with browser extensions that change fonts */
  font-family: "icons-boxes" !important;
  background-color: #fffeb4a3;

  padding: 0.5em;
  margin-top: 1em;

  /* Better Font Rendering =========== */
  -webkit-font-smoothing: antialiased;
  -moz-osx-font-smoothing: grayscale;
}

[class^="box"]::before {
  padding-left: 0.4em;
  padding-right: 0.8em;
}

/* Add icons */

.boxBell:before {
  content: "\f0f3";
  color: #9f6000;
}
.boxCheck:before {
  content: "\f058";
  color: #4f8a10;
}
.boxComment:before {
  content: "\f075";
}
.boxHeart:before {
  content: "\f004";
}
.boxInfo:before {
  content: "\f05a";
  color: #00529b;
}
.boxPlus:before {
  content: "\f067";
}
.boxStar:before {
  content: "\f005";
}
.boxWarning:before {
  content: "\f06a";
}

/* Set colors */

.boxBell {
  background-color: #f1f500a4;
}

.boxWarning {
  color: #fff;
  background-color: rgba(217, 83, 79, 0.9);
}

.boxCheck {
  background-color: #dff2bf;
}

.boxInfo {
  background-color: #bde5f8;
}
- Download and extract
this custom font (7kb) in
static/fonts
That’s it!
Now to insert an infobox, you just need to insert in your markdown something like
<div class="boxInfo">Your text</div>
Feel free to add border-radius and box-shadow
Now let’s see how to make it faster with Vscode
Let’s get faster with Vscode autocompletion
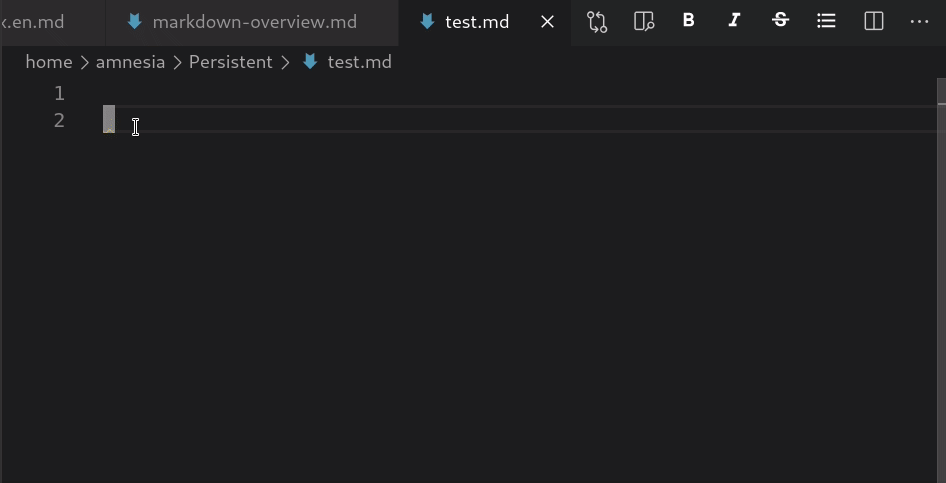
Vscode comes with powerful autocompletion: in an HTML file, just type .boxInfo then press Tab and you get a <div> prefilled with the class you defined
Here is a demo:
To activate autocompletion in Markdown files, paste the following lines in your settings
"settings": {

    "emmet.includeLanguages": {
        "markdown": "html"
    },

    "[markdown]": {
      "editor.quickSuggestions": false
    },
}
(The second part removes the noisy suggestions)
You may also add, depending on your configuration
"html-css-class-completion.enableEmmetSupport": true,
You’re done! Now you can type .boxInfo, then Tab and the following code is inserted:
<div class="boxInfo"></div>
Type your text between the tags and enjoy!
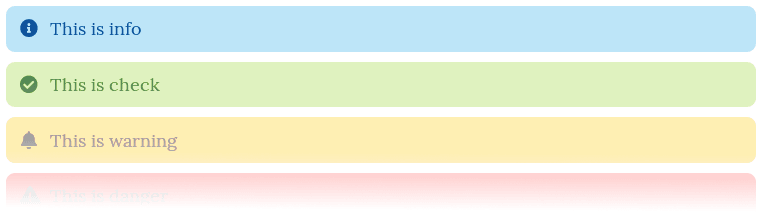
The following boxes are available:
<div class="boxBell">Disclaimer</div>
<div class="boxCheck">Check</div>
<div class="boxComment">Comment</div>
<div class="boxHeart">Heart</div>
<div class="boxInfo">Info</div>
<div class="boxPlus">Plus</div>
<div class="boxStar">Star</div>
<div class="boxWarning">Warning </div>
will display:
How to use HTML and Markdown inside an infobox
Using Markdown inside one of these infoboxes doesn’t work as expected: the Markdown is not rendered
The trick: You need to insert an empty line before your Markdown or HTML
<div  class="boxInfo">Note:

This is **bold** and this is _emphasized_. [this is a link](https://www.mattmayes.com)
</div>
Will show
This is bold and this is emphasized. this is a link
Troubleshooting
It’s not working? You may need to
allow HTML rendering with these lines in config.toml:
[markup.goldmark.renderer]
  unsafe = true
References
- https://isabelcastillo.com/error-info-messages-css
- https://jdhao.github.io/2019/12/29/hugo_html_not_shown
- https://discourse.gohugo.io/t/markdown-mixed-with-html-stops-links-from-being-rendered/27993/6
Further readings
- An implementation in the theme Hugo Book
- https://hugoloveit.com/theme-documentation-extended-shortcodes/#4-admonition
- https://discourse.gohugo.io/t/preprocessor-additions-to-markdowns-syntax/5230/5
- https://discourse.gohugo.io/t/manipulate-markdownify-output-in-shortcode/23963
- https://github.com/martignoni/hugo-notice
- A shortcode to insert CSS styles: https://web.archive.org/web/20220126113737/https://codeit.suntprogramator.dev/theme-documentation-extended-shortcodes/#1-style